

How To Replace Fuel Filter
May 30th 2025
Ensuring that your fuel delivery and air intake are clean and efficient is an essential part of vehicle maintenance. The fuel filter is one of the vital fuel system parts that needs to be checked regularly. Knowing how to change your fuel filter can save you money in the long run and ensure that your vehicle is running its best.
The fuel filter is the backbone that keeps your engine running and the fuel system working. It not only keeps dirt, rust, and debris out of your fuel supply, but it also prevents damage to the carburetor or any part of the fuel system. Over the years, those particles clog the fuel filter, slowing fuel flow and causing poor driving performance.
Modern fuel systems, especially those equipped with high-performance components like PTFE lined fuel hose and redhorse fittings replacement fuel filter systems, require clean fuel to function properly. A clogged fuel filter can cause reduced fuel pressure, poor acceleration, engine hesitation, and in severe cases, complete fuel starvation that can damage the fuel pump or engine.
Understanding how to replace fuel filter components yourself not only saves money on labor costs but also ensures the job is done correctly with quality parts. This guide will walk you through the complete process of how to replace your fuel filter safely and effectively.
When to Replace Your Fuel Filter
Just as important as knowing how to replace your fuel filter is knowing when to replace it. While 20,000 to 40,000 miles is the general recommendation for when to replace a fuel filter, ask your mechanic for a more precise number depending on your car, your driving habits and your state’s climate. There are a few signs you may experience if your fuel filter is causing problems. If you've experienced engine stalling or heard loud pinging noises going up a long incline, you may want to check your fuel filter.
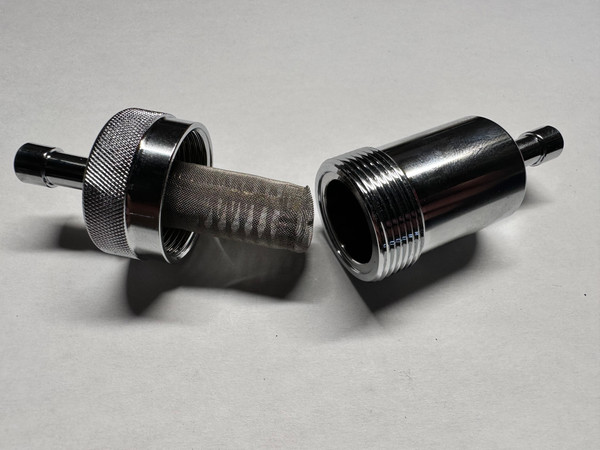
For vehicles equipped with an in line fuel filter, visual inspection can sometimes reveal the filter's condition. A severely clogged filter may appear dark or contain visible debris. However, many modern vehicles have fuel filters located inside the fuel tank as part of the fuel pump assembly, making visual inspection impossible without removal.
High-performance applications or vehicles using performance fuel filter systems may require more frequent replacement intervals. Racing fuel, ethanol blends, and contaminated fuel supplies can accelerate filter clogging, necessitating more frequent maintenance..
Steps to Replace Your Fuel Filter
Replacing a fuel filter requires attention to safety procedures. You also need to make sure you’re using the right techniques if you are replacing your fuel filter on your own. The fuel system operates under pressure, and fuel vapors are highly flammable, making safety a top priority.
Step 1: Remove fuel pump fuse or relay
Begin by locating the fuel pump fuse. Usually this is marked on the fuse panel diagram or might be found in the engine compartment or interior pass-through to the interior fuse panel. To stop the fuel pump from working during replacement, you should take off the fuse or relay of your fuel pump. This is a vital first step that needs to be taken in order to safely depressurize the fuel system.
Step 2: Start your engine
Remove the fuel pump fuse then start the engine and let it idle until it stalls. This will begin to burn off whatever fuel is remaining in the fuel lines, and also drops system pressure. It will run for 30 seconds to several minutes, depending on how much fuel is left in the lines. This step significantly reduces the fuel that will spill as a result of changing the filter. This step helps minimize the amount of fuel that will spill when changing the filter.
Step 3: Disconnect the battery ground cable
Safety should always be your top priority when working with fuel system components. Disconnect the negative battery cable to eliminate the possibility of electrical sparks that could ignite fuel vapors. Put the cable away from the battery terminal to prevent accidental re-connection during the repair process.
Step 4: Have drain pan ready
Place a drain pan below the fuel filter area for any spilled or leaked fuel around the fuel pump. Even after depressurizing the system, some fuel will still be in the filter and connecting lines. Use a large drain pan for potential spills and have paper towels nearby to clean up any fuel that misses the pan.
Step 5: Push release buttons on filter
Modern fuel filters are largely attached to their lines with quick-disconnect fittings. Look for release buttons or tabs on these fittings, and press them in while pulling the fuel line gently away from the filter. Some filters may use threaded fittings that require wrenches for removal. Work carefully to avoid damaging the fuel lines or fittings.
Step 6: Recycle used fluids
Disposing of the old fuel filter and any spilled gasoline is both an environmental and legal concern. Bring the used filter and contaminated fuel to a shop that accepts these materials for recycling. Do not throw fuel or fuel-saturated substances in the trash and do not pour it down the drain.
Step 7: Remove the filter
After disconnecting your fuel lines, unbolt the filter from the bracket or clamp. Notice the flow direction of the fuel, which is usually an arrow on the filter housing. Clean your circular air filter by unscrewing the clamps, usually held in place with a screwdriver or wrench, or alternatively some clamps on filters have plastic clips or brackets.
Step 8: Install the new filter
Install the new filter into the same position as the old filter, and make sure the arrow for fuel flow is pointing toward the engine. If your replacement fuel filter is for aftermarket applications, be sure it exceeds the flow rate of your fuel system. Install the filter into the mounting bracket and connect the fuel lines, be sure all fittings are securely attached.
Step 9: Replace fuel pump relay
Reinstall the fuel pump fuse or relay that you removed in step one. Double-check that you've installed the correct component in the proper location according to the fuse box diagram.
Step 10: Turn your ignition ON
Turn the ignition key to the ON position without starting the engine. This activates the fuel pump and begins pressurizing the fuel system. You may hear the fuel pump running for several seconds as it builds pressure throughout the system.
Step 11: Check for leaks
With the fuel system pressurized, carefully inspect all connections around the new fuel filter for leaks. Look for fuel drips, wet spots, or fuel odors that could indicate loose connections. If you discover any leaks, turn off the ignition, relieve system pressure, and retighten the affected connections before proceeding.
Start the engine and allow it to idle while continuing to monitor for leaks. The engine may take longer than usual to start as the fuel pump refills the system. Once it’s running, check that the engine operates smoothly and shows no signs of fuel starvation.
Conclusion
Learning how to replace your fuel filter is a valuable maintenance skill that helps ensure reliable engine performance. Regular fuel filter replacement prevents contaminants from reaching the engine and extends the life of the fuel pump and other fuel system components. Whether you're maintaining a daily driver or upgrading to high-performance fuel system components, following proper replacement procedures ensures safe, effective results. Remember that fuel system work requires attention to safety, proper tools, and quality replacement parts to achieve professional results.
By following these steps and maintaining regular replacement intervals, you'll keep your fuel system operating at peak efficiency while avoiding costly repairs caused by contaminated fuel or clogged filters.